
Math Monday: Decreasing - Part II - across a row/round
In the last installment of MATH MONDAY, I wrote about the formula for calculating decreases along a specific length. (Go back and review that, if you’d like, but we’re going to do it again in a different iteration.) We started out with a slightly more difficult example. Today, I’m going to be sharing how you evenly place decreases across a row or a round.

This is Barnstorm. The sleeves are a bit unusual.
Before we start, here’s a little bit about the sweater so we can work with the numbers: Barnstorm is a favorite of mine. I love the unique yoke patterning and ribbing. If you’re a sweater knitter, you know that typically, you need to decrease when you transition from ribbing to stockinette. Barnstorm is worked bottom up and has a split hem. The front and back hems are knitted flat in ribbing and then joined to work in the round. The rest of the body to the underarms is knit in stockinette. The sleeves have a split at the cuff, but follow the same sequence - ribbing flat, stockinette in the round to the underarm.

Sleeve detail in Barnstorm
We’ll be working on the sleeve decreases today. For this size the sleeves go from 55 sts to 38 sts. If we subtract these two numbers, we know we’ll need to decrease 17 sts across the row. We then set up our division equation, just like last time. We use 55 because this is how many stitches are starting with.
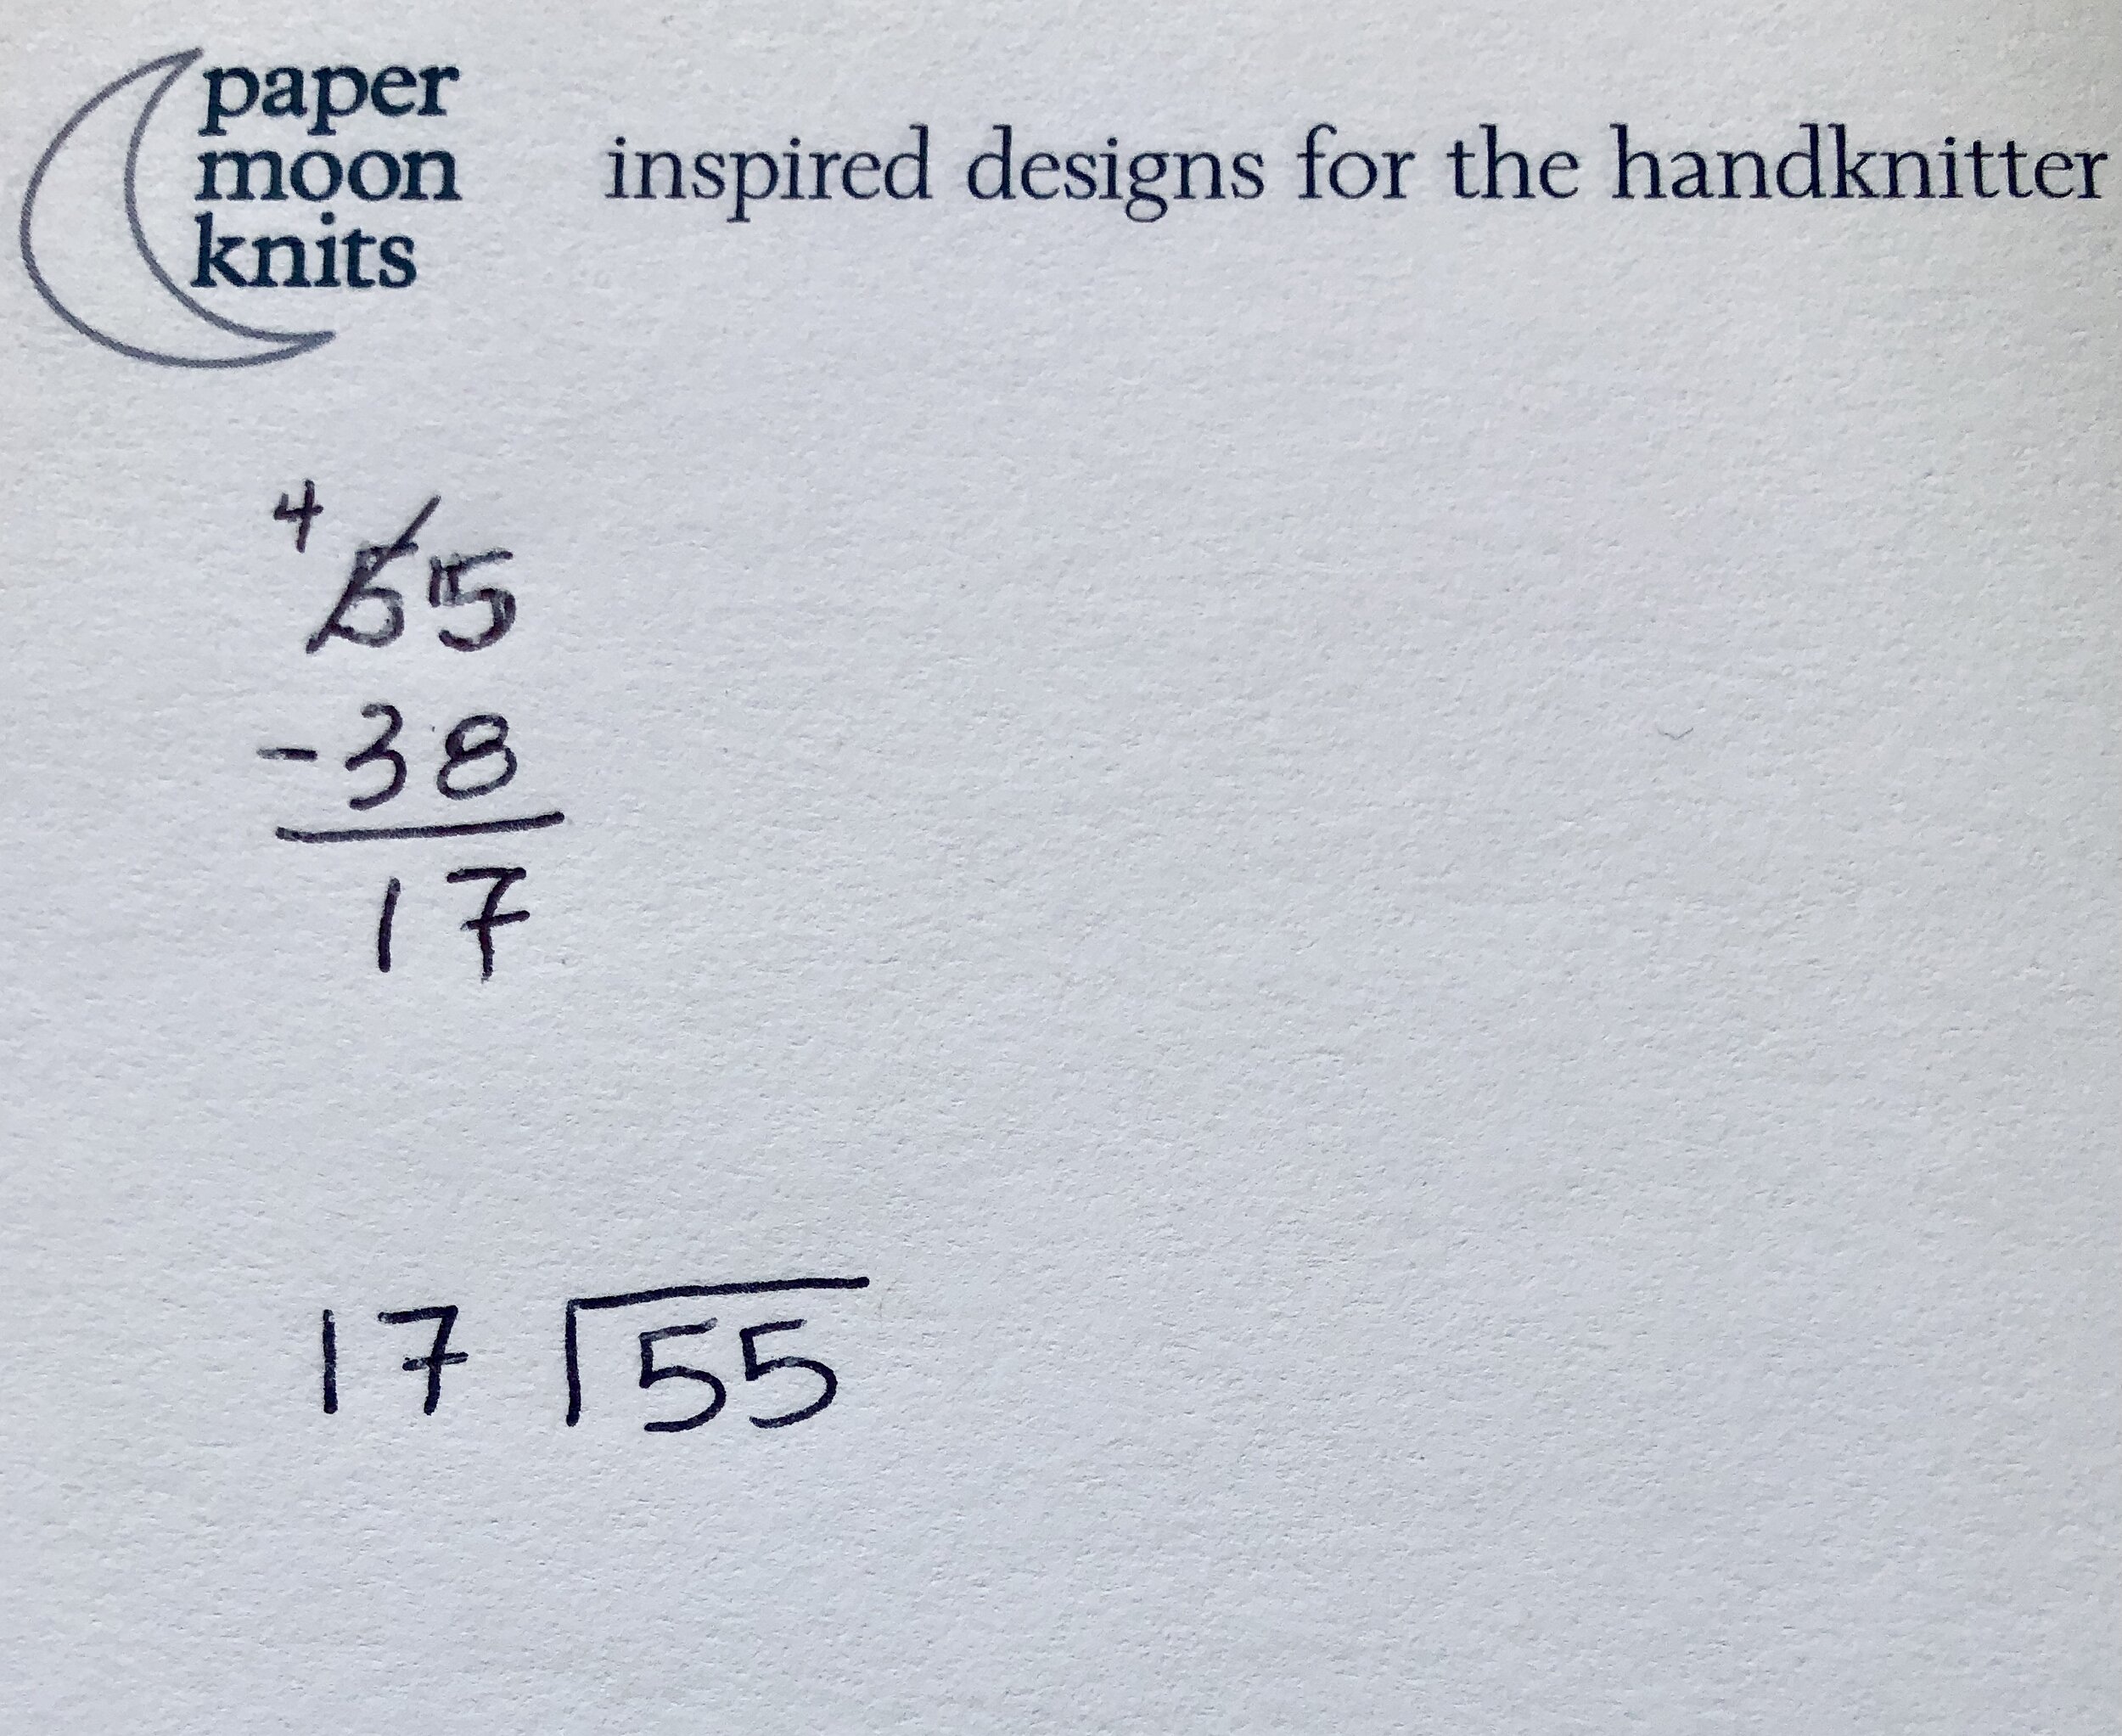
Just like last week, we solve the equation, adding 1 to the quotient and then subtracting the remainder from the divisor.

Draw the X from quotient to secondary remainder and from quotient + 1 to the remainder. We now know we have to decrease every 4th stitch 4 times and every 3rd stitch 13 times. This is a little different than last week because we are decreasing over stitches and not rows.

The first thing I want to say is that working a decrease every 4th stitch does not mean you work 4 sts and then do a decrease! It means that the decrease needs to occur so that the last worked stitch is stitch number 4.
In this case, if you’re using a k2tog decrease, you would k2, then k2tog. This would use 4 sts. If you’re working a decrease every 3rd stitch, you would k1, then k2tog. This would use 3 stitches. Remember, you only have 55 stitches to get all these decreases in.
Now for the execution. There are a number of different ways to do this. The first way is to just do the decreases as written - every 3rd stitch 13 times and every 4th stitch 4 times.
The second way would be to intersperse the every 4th between the every 3rd in a sort of even way. So every 3rd stitch 4 times, then every 4th stitch once, then every 3rd 4 times, then ever 4th once…. Four doesn’t divide evenly into 13 so you’d still have a bit of unevenness in this, and it involves math that isn’t really necessary - no one will really notice whether you’re decreasing on the 3rd or 4th stitch, except if they’re using a magnifying glass. I don’t like either of these ways because your final decrease will be on the very last stitch. Not a great idea!
Here’s what I like to do:
First I take the decrease that I’m going to do fewer times, in this case the 4th stitch every 4x, and I divide that in half. I’ll do this decrease 2x at the beginning of the row and then 2x at the end with the 13 decreases every 3rd stitch in between. Before I get started though, I want to make sure I don’t end up with a decrease on the very last stitch, so I’ll split that first decrease in half. Instead of doing it at the 4th stitch, I’ll do it at the 2nd. This works when the first decrease is more than 2 stitches because if I do this, then I’ll have to start out with a decrease at the very beginning of the row (remember, the last stitch of the decrease will have to be on stitch 2 which means I’ll start out with a k2tog) - also not a good idea.
So what I’ll do in this case is k1, k2tog as my very first 4 stitch decrease - (I know it’s really only 3 stitches). Then I’ll do k2, k2tog (my second 4-stitch decrease). Then I’ll do k1, k2tog 13 times. Then I’ll do k2, k2tog 2 times (as my last two 4-stitch decreases and I have 1 stitch left over. The beginning and the end of the row have the same number of stitches!
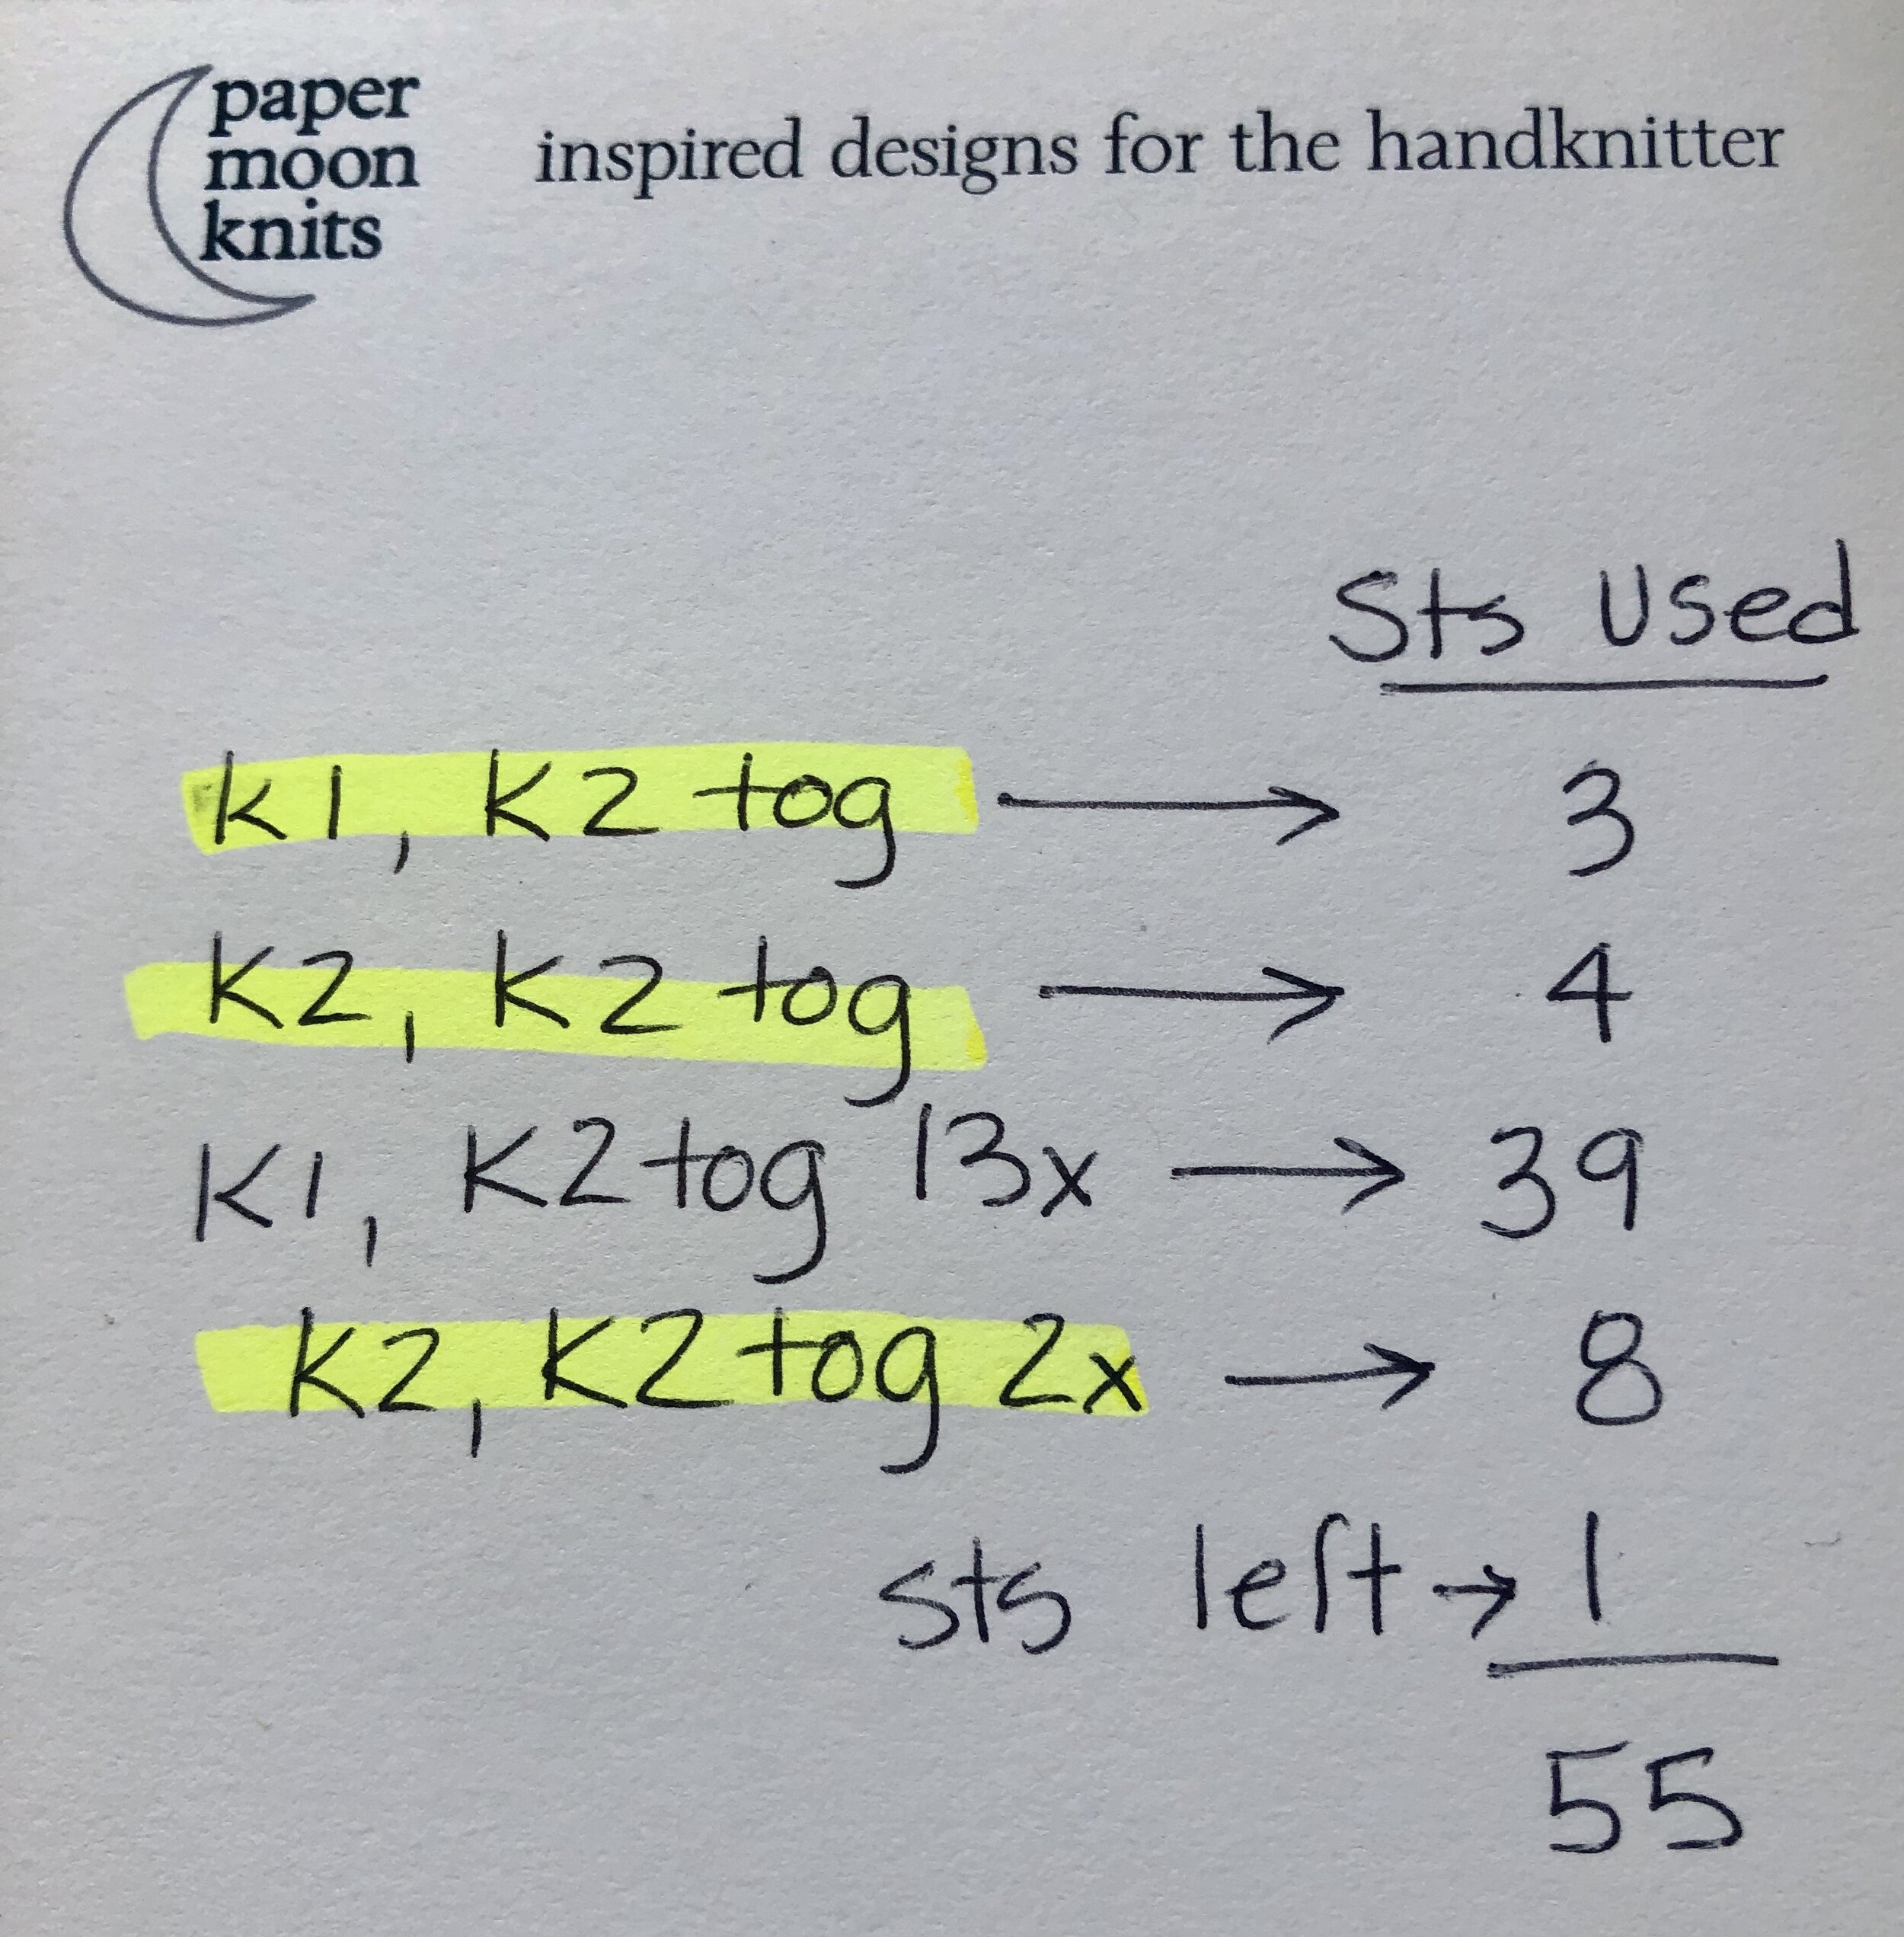
The proof is in the math! The highlighted lines show the 4-stitch decreases done 4 times.
The beauty of this method is that it works the same way for knitting flat as knitting in the round. The one stitch at the beginning and end of the round equal 2 stitches between the k2togs.
